Showing posts with label recipes. Show all posts

Monday, July 6, 2015

Mely's Knock-off Mcgriddles


I can't remember how this happened but one fateful day I stumbled across "French Toast Bread" at Safeway, purchased it and realized it reminds me of the bread McDonald's uses to make their breakfast McGriddle sandwiches because the bread has small bits of maple syrup (or maple syrup flavored pieces?) in it. So without further ado here's my knock off version of McGriddle Sandwiches featuring:

Safeway's "French Toast Bread"


Ingredients:

4 Eggs
6 Strips of Bacon (or two sausage breakfast patties, pick your poison)
2 Slices of American Cheese*
Butter for Cooking

Cook your bacon or patties to your liking. I'm a freak and I like my bacon soft so it doesn't take me long.

Fry up your eggs in some BUTTAH! Remove from pan and set aside with your chosen meat.

Now is the fun part, smear a bunch of butter on your hot pan and lay two pieces of your bread. Pile each piece with 2 eggs, 3 slices of bacon (or a sausage patty) and a slice of American cheese.

Top each off with another slice of bread. Let the butter brown on the bottom of the bread and carefully flip and let your flipped side brown, this should take no longer than 4-5 minutes total.

I like wrapping these in foil and taking one to work or wrapping one in foil for Tony.

*I love Cheddar and real cheese as much as the next food snob but American is a must in this recipe, do the American thing.

Thursday, July 2, 2015

Creamy Tomato Pennes


This recipe is great with ingredients out of your pantry, the only thing I needed to buy was the heavy cream.

What you will need:
  • 1 box Pennes or any kind of pasta you like! - Cooked and drained
  • 1 small tomato diced or a small can of diced tomatoes (optional)
  • 1/2 small yellow onion
  • 4 garlic cloves
  • 3 TBSP Olive Oil
  • 2 cans Tomato Sauce
  • 1 Cup of grated parmesan cheese
  • 1/2 to 3/4 of a pint of Heavy Cream
  • Seasonings and herbs to taste, any kind you like! Salt, Garlic Salt, Italian Seasoning, Fresh Basil, Crushed Red Pepper --I used Italian Seasoning, Garlic Salt and Crushed Red Pepper

Start with a fairly large skillet and start heating your olive oil over medium high heat

While that's heating dice your onion and finely mince your garlic

Once your oil is hot add the onion and garlic and cook until translucent and the edges are golden

Add your tomato sauce, diced tomato and seasonings

Simmer your sauce on low to medium heat stirring frequently until thick and bubbly (about 7-10 minutes)

Add your cream, parmesan and diced tomato and mix really well and simmer for another 5 minutes. Add your pasta, mix and serve!

You could also choose to add any kind of protein you desire, Chicken, Prawns, or Italian Sausage but I kept it simple.

Enjoy!


Wednesday, June 17, 2015

Best Banana Bread

I don't usually do Bananas. I buy them for Tony but I kind of dislike them. The other day I bought a pack of Bananas at Costco and left them in the plastic bag. Unbeknownst to me, Bananas ripen within days when left in plastic. I ended up with 4 brown Bananas and a Google search for a good Banana bread recipe. I was not disappointed, for somebody that hates bananas this banana bread recipe was ah-mazing. I didn't have walnuts so next time I'm using walnuts and an actual designated loaf pan. I had to share. This recipe is easy but does require a few steps. I promise it's worth it. (I separated the ingredients to make it easier whilst going through the steps)

1 2/3 Cups Flour
1 TSP Baking Soda
1/4 TSP Ground Cinnamon
1/2 TSP Salt

1 Cup Sugar
2 Eggs

3 1/2 Ugly Brown Bananas
2 TBSP Sour Cream
1 TSP Vanilla Extract

1/2 Cup Vegetable Oil

2/3 C Walnuts

Preheat your oven to 350

Sift flour, baking Soda, cinnamon and salt in a large mixing bowl and set aside

Mash your bananas, sour cream and vanilla until smooth

Beat sugar and eggs until light and fluffy, about ten minutes and slowly add the oil whisking as you go

When sugar and egg mixture is combined add the banana mixture and whisk until combined

Fold your wet ingredients into your dry ingredients in large bowl. Add Nuts.

Pour into a greased loaf or Bundt cake pan. Bake 45 minutes to an hour until an inserted toothpick comes out clean.

Wednesday, January 28, 2015

Fancy Quiche


Note: I was having technical difficulties uploading pictures so I will add a pic as soon as I can because recipe posts without pictures suck.


Last night I made a Quiche, I considered it fancy so I named it Francois. Quiche is great because you can have it as breakfast, lunch or dinner. I've made an American style Quiche before, you can find that here. It's also fun to customize and play with the ingredients, meats and cheese. Heavy cream makes a quiche fluffy without having a heavy egg flavor. Quiches are not meant to feel like you're eating egg in a crust!


What you will need:
7 large eggs
2 cups finely grated Gruyere (or any other sharp cheese you'd like such as white cheddar)
1 Cup of Heavy Cream
8 Slices Thick cut Applewood Smoked Bacon
1 cup fresh Spinach Leaves
4 small or medium mushrooms (I used Portabello or Crimini)
1 teaspoon salt or garlic salt
1 deep dish pie crust in a tin (sold in the frozen section at the store)
*I sometimes make my own pie crust because I feel real dedicated, I use this recipe and my own pie dish


Preheat your oven to 375

Cut your bacon until small bite size pieces and fry until chewy not crispy. Drain the fat and set aside to cool.

Wash your mushrooms and spinach. Slice your mushrooms into thin slices (about 1/4 of an inch thick).

In a large mixing bowl combine your eggs, cream and salt and beat the living crap out of it with a spoon until nice and smooth and all the yolks are broken and mixed in.

Add your cheese, mushrooms, spinach and cooled bacon. Gently mix together.


Pour your mixture into your pie crust *


Loosely cover your Quiche with foil and bake on the top rack for 30-35 minutes covered. Then removed foil and bake for another 20-25 minutes until Quiche is golden and only slightly jiggly.


Let your Quiche cool.


*You will probably have some leftover mixture. This is because I haven't put forth the effort to exactly determine what quantity will fill up exactly one deep dish pie crust. Don't freak out, usually those frozen pie crusts come in sets of two at the grocery store. Or if your grocery store sucks, they don't provide deep dish pie crusts they only provide regular pie crusts in which case you have two regular pie crusts and can fill both to make two quiches. If you only have one pie crust you can pour the leftover mixture into a baking tin or a muffin tin for a few leftover mini crustless Quiches. The point is you can get creative with what you do with the leftover.

Enjoy!


Wednesday, December 17, 2014

Happenings

 
I should start off by saying I have no idea how some women (bloggers I read) are able to find time to raise children, have full time jobs and blog perfectly beautiful blog entries 3-5 times a week with dozens and dozens of pictures. I have been super overwhelmed and haven't blogged weekend recaps in a couple weeks. I figure that's okay since my blog doesn't have heavy traffic along with people that expect me to blog every day and most of the people that do come to my blog are people that see me cooking on Facebook and want to get my recipes.
 
Since I am an Accountant by nature, I love pretty summarized paragraphs so that's what I will do!
 
ANNOUNCEMENT!
I was offered an accounting position at a local winery on the third of this month. This just so happens to be a winery owned by Francis Ford Coppola, for any of you that aren't Sonoma County locals or live under a rock Francis Ford Coppola is a famous hollywood director (think The Godfather trilogy) and he owns a company called Francis Ford Coppola Presents which has three wineries, several resorts around the world, a restaurant in SF and a fine foods line. So techinically I will be working for the mother company of all these entities. It's a dream come true, I can hardly believe it's happening but it is! I realized a few months ago that non-profit accounting is not my calling and I had been searching for something more my fit for a few months. I start my new position on the 22nd (the week of Christmas, YIKES!) but I am so so grateful for the oppurtunity to work here. Dream come true for sure!!!
 
7 Monthiversary
Yesterday marked 7 months of being married to my hunky, tall, strong, brown husband. Whenever I talk to people my own age (early twenties) I always relay to them that marriage is the hardest thing I have ever done but it is the most gratifying. I can candidly admit that Tony and I are very different and our personalities are almost opposite but the one thing we have in common is the same fundamental beliefs and one common goal: to make our lives better because we are together.
 
 
Casa Gudino
My Momma is getting ready to put up her and my Dad's home for sale. My parents bought this big home on a golf course in the suburbs of Santa Rosa (my hometown) when I was 14. I lived in this home that I loved so much until I got married at 24. My whole adoloscence and early adult years were spent in that house so it's kind of sad to know that it won't be ours anymore but this is the best move for BOTH of my parents and I fully support them.
 
Christmas
I've been slowly buying Christmas gifts for my family. My list of people to buy for has grown this year and it's Tony and I's first Christmas as a married couple. My Christmas list looks like so:
Momma, Dad, PK, My brother, Brother's GF, my nephew, my two nieces, my cousin and her husband, Tony's parents, Tony's sister, Tony's brother. I have bought gifts for everybody except my Dad, Tony's Dad, Tony's brother and one of my nieces. I'm excited to do some more Christmas shopping this weekend! I also have a few friends I want to buy something small for! The recurring theme for my presents this year has been small but thoughtful instead of buying one large thing for each person I've been focusing on getting a few useful things for each person like:


I LOVE The Body Shop and so of course I had to share my favorite product with my loved ones for Christmas!
 
I also had to throw in some PartyLite product, especially for my peeps that I know love some candles!
 
I don't usually like Bath and Body Works since I find skincare products from The Body Shop are far superior but they have good bundle deals on hand soaps so I got a few of those!


I think I might go back and get a few more for myself ;)


And can I get an AMEN for all of the cool gift ideas Starbucks provides every year?! I mean Starbucks is my go-to for gifts.
 
On the Cooking Front...
Monday I tried to recreate Chic-Fil-a's Spicy Chicken Sandwich and although the results were delicious, the sandwich wasn't spicy enough. I look forward to tweaking this chicken this weekend and posting the perfect copycat Chic-Fil-A spicy chicken sandwich recipe for you!


 On the Social Front...
My in laws are leaving to Mexico on the 18th, while I am kinda bummed I won't be able to hang out with them and joke around like we do while they're gone, I will be able to cook and bake without getting in my Mother in Law's way! Saturday we are having my friend and her boyfriend over for an all american meal, Steak or Ribs, Corn on the Cob, Baked Potatoes and Rolls!

See you on next Monday when I post my weekend story and my spicy chicken sandwich recipe!

~Mely


Tuesday, December 2, 2014

Moist Carrot Cake with Cream Cheese Frosting


For the Carrot Cake:
1 Cup Sugar
3/4 Cup Oil
1/4 Cup Plain Greek Yogurt (I use Fage)
3 Large Eggs
2 Teaspoons Pure Vanilla Extract
2 Cups Flour (I use Soft Silk Cake Flour but honestly I don't even know if that makes a difference)
1 TSP Baking Soda
2 TSP Ground Cinnamon
1/4 TSP Ground Nutmeg
1/2 TSP Salt
2 Cups of Finely Grated Carrots

For the Frosting:
8 OZ Softened Cream Cheese
1 Stick Softened Butter (Salted)
2 TSP Pure Vanilla Extract
2 - 2.5 Cups of Powdered Sugar

Preheat your oven to 350.

In a large bowl beat (using a stand or handheld mixer) sugar and oil, then add yogurt until creamy. One at a time add the eggs and beat until well mixed. Then mix in the Vanilla Extract. Set aside your wet ingredients.

In another bowl combine your dry ingredients; Flour, Baking Soda, Cinnamon, Nutmeg and Salt.

With a spatula, manually mix your dry ingredients into your wet ingredients just until you can't see any more flour pockets then fold in your carrots.

Bake your cake 30-35 minutes until an inserted toothpick comes out clean.

While your cake bakes, make your Frosting. I used my Ninja Food Processor with the mixer attachment but you can use a stand mixer or a handheld mixer (I just live in the dark ages and don't have a stand mixer). Simply combine all ingredients and mix until mixture is creamy. Start with 2 cups of powdered sugar and add a little more depending on how sweet you want your frosting, I ended up using 2 1/4 Cups.


Now this step is very important, DON'T be like me and frost the cake before it has cooled. I didn't have the patience to wait and wanted to retreat to bed that I went right for it! This is what I ended up with when I tried to frost my cake while it was still warm:


Carrot Cake: Melty Edition
 
Evidently patience is not my greatest virtue :) still tasted great though!
 
Happy Thanksgiving Eve!
~Mely


Tuesday, November 25, 2014

Weekend Story

 
Friday
 
Friday Tony and I went to the Warriors game in Oakland! The traffic going into the Bay was hideous and I should have known considering it was a Friday but we got there with an hour to spare and we immediately went inside to our seats. It was both Tony and I's first time at a Warriors game and my first time at a professional sports game and it was so much fun! The Warriors are one of the best teams in the NBA right now and it was so much fun watching them play live, I even joked to Tony it was nice seeing my boyfriends Andrew Bogut and Klay Thompson ;)


Quick side note about the above pic: We had actually both been up since 4AM because I couldn't go back to sleep after he went to work. I binge watched Gilmore Girls for 2 hours on Netflix before getting up to go to work! I drank approximately 250% more caffeine than he did on Friday which is why I don't look tired.
 
 
On the way to the game we picked up some Esstarbucks. I took this pic of our his and hers iced coffees. I marveled at the fact that this husband of mine never drank coffee before we dated and slowly but surely I got him hooked.
 
 
An iPhone pic of our view of the court!
 
Saturday
Saturday we went to the gym and then my Mom's house for dinner. Tony left to his friend's house to watch the Pacquiao fight and I stayed back and lounged at my Mom's... I even took a nap in my Mom's bed! My Mom baked some Oatmeal cookies and I prepped some Chicken to fry up on Sunday!

 
I let this Chicken sit overnight in Buttermilk, Garlic, Lemon Slices, Rosemary, Salt and Pepper.
 
Sunday
 
Sunday we went for a quick hike with my Mom early in the morning. We came back to my Momma's house and picked up some Starbucks and Donuts. Because if you exercise before eating donuts it makes them calorie free. Didn't you know?! #denial
 
I painfully watched as my Niners played and it was another ugly win. For the last 3 weeks they have been ugly wins. When will our offense start playing as well as our defense? Anyways, we play Seattle on Thanksgiving and I hope and pray our offense can get something going. Please, pretty please?

 
One thing is for sure though, it was so nice having this guy back. Our pass rush was almost non-existent while he was suspended.


And my fried chicken came out pretty good!
 
After the game we came home to watch the Walking Dead...


And I watched 90 Day Fiance because ain't nothing like some good ole' TLC Reality Shows...


This week I only work Monday and Tuesday and I am so excited to cook this year for Thanksgiving! I will be making:
 
TPW_8617
 
Pioneer Woman's Restaurant Style Smashed Potatoes
 
 
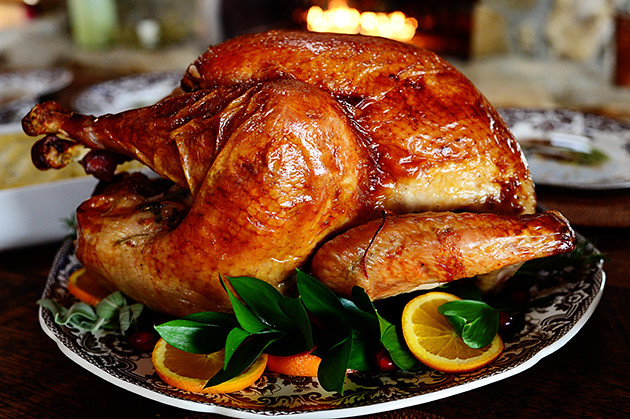
Thanksgiving Turkey
 
Along with a roasted Turkey brined with PW's Turkey brine...
 
 
And for Dessert I will be making a whole bunch of PW's Cinnamon Rolls with Maple Frosting.
 
Happy Thanksgiving Week!
 
~Mely

Tuesday, November 11, 2014

Mely Cooks Monday - Quiche


I love Quiche, I especially love the gourmet ones that cost $16 at Oliver's, but yesterday I had this wild idea to make a Quiche because I had some eggs in my fridge that needed some loving. So I googled Quiche recipes and I made up with this easy recipe. Unsurprisingly, my lover had never eaten Quiche before so further expanding on my efforts to widen his culinary horizons I knew I HAD to bake a Quiche. Here it is...


What you will need:
2 Frozen Pie Crusts in a tin, thawed according to direction
5 Extra Large Eggs
8 OZ Shredded Cheddar Cheese
1 Cup Heavy Cream (1 cup = 1 little box)
7-8 Bacon Slices
1 Large Potato
1/2 White Onion
Olive Oil
Salt & Pepper to taste
 
Preheat your oven to 375.

Dice your potatoes and onion into small cubes.
 
Heat up a non-stick skillet and slice your bacon into 1 inch squares. Once the skillet is hot, add your bacon. Cook bacon until it is chewy but NOT crispy.

Remove bacon from the skillet and allow to cool and drain on a paper towel.

Remove the pan from the stove and drain most of the bacon fat from the skillet, reserve about 4 TBSP to cook your potatoes and onions. First add your potatoes and some salt to taste to the pan, cook your potatoes until they start to get soft (about 5 minutes) and then add your onions and allow your potatoes to brown and your onions to caramelize (about another 5-7 minutes). If you find your potatoes are sticking, drizzle with some Olive oil. Once completed, allow mixture to cool.
 
In a large bowl whisk eggs and heavy cream with ground pepper until creamy. Then add your cheese, bacon pieces and your by now cooled onion/potato mixture. Mix well and pour into your pie crust.


Pour your mixture into your pie crusts evenly distributing it between both. Loosely cover both Quiches with foil and bake on top rack for 30 minutes. After 30 minutes, remove the foil and allow the Quiches to finish browning for another 15-20 minutes.

Remove your Quiches from the oven and allow to cool for 10 minutes before digging in.

I must admit, I was really impressed with myself being that this was my first time making Quiche. There's just a couple things I would do differently next time:

~I would use Jalapenos for a kick
~Red Bell Pepper/Spinach for a pop of color
~Play around with the cheeses and meat (Tony requested Sausage next time)
~Add some Garlic for a little flare
~Make my own pie crust and make one deep dish Quiche as opposed to two regular sized Quiches

I encourage you to try this recipe out and play around with the ingredients to make it your own!
~Mely

Thursday, October 23, 2014

Mini Baked Ham and Cheeses with Bacon

 
I seriously don't know how I come up with the recipes for food that I make, it just happens. I think I just look to see what I have in my fridge and what sounds good and I get right to it. These were amazing.. so amazing! Make them today.
 
In my fridge I had:
 
Land O Lakes Spreadable Butter
Sliced Muenster Cheese (my favorite)
Applewood Bacon
 
Then, I went to Safeway and I bought some Honey Ham and King's Hawaiian Rolls and I rushed home to create these babies.
 
What you will need:
18 slices Honey Ham
6-8 Slices of Muenster Cheese (you can use Cheddar or American instead)
16 roll pack King's Hawaiian Sweet Rolls
Softened Butter for spreading
6 slices of Cooked Bacon


First I needed to cook my bacon, I hate cooking bacon on the stove so I laid out my pieces on a foiled baking sheet and baked for 20 minutes or so at 400 until my bacon was beautiful and browned.


MMMM Bacon! Notice the piece missing in the middle, I have no self control
 
Now lay down your bottoms and butter them. Buttered Bottoms: I like the sound of that. Buttered Bottoms: say that 5 times fast!


Okay, add some folded ham pieces to those buttered bottoms...


Behold: Buttered Bottoms with Ham
 
Okay this is the best part, lay out some sliced cheese and bacon on those buttered bottoms with ham...

 
And add the tops and bake! Your oven will already be warm from the bacon. Just turn down to 300 and bake for 10-15 minutes until cheese is melted and bread is golden.

 
 This is what they look like before baking. I couldn't be bothered with taking pics of the final product because I was too busy taking in the full cheesy pork goodness.
 
Enjoy!
~Mely
 

Wednesday, October 15, 2014

Customizable Cookie Dough Recipe

 
I recently made Heath Bar Cookies, Reese's Pieces Cookies and my regular old Chocolate Chip Cookies. This recipe makes a lot of cookies, it makes about 6-7 dozen cookies. You can freeze some cookie dough for later use or refrigerate it and make cookies through out the week for family, friends, coworkers or your spouse :) Or you can half the recipe but that's not how I roll right now.


4 Sticks butter - softened
2 Cups of brown sugar
1 Cup granulated sugar
2 Eggs
2 Teaspoons Pure Vanilla Extract
4 1/4 Cups of Flour
2 Teaspoons Baking Soda
1/2 teaspoon of Salt
2-3 12-OZ bags of any candy/chocolate/nuts combination your heart desires!
 
Examples:
White Chocolate
Chocolate Chips
Heath Bar Baking Chips
Reese's Pieces
Reese's Peanut Butter Chips
Walnuts
Pecans
Toffee Chips
M&Ms
Raisins - eww
 
Preheat your oven to 375
 
Beat the sugars, butter, vanilla and eggs until creamy (use a stand mixer or a handheld mixer).
 
 In a seperate bowl mix the flour, salt and baking soda. Combine wet and dry ingredients and mix to form a dough. Sorry, the only way I found that works for this is using your hands.
 
Seperate your dough into thirds for different types of cookies unless you only want one kind of cookie. Add your Candy/Chocolate/Nuts. Add as little or as much as you would like.
 
Roll your dough into rounded tablespoons and bake 12 on an ungreased cookie sheet for 10 - 15 minutes at 375. Remove when the cookies are golden and only the centers look a little soft, do not overbake!
 
To store dough place in a ziplock freezer bag removing all the air and store in the freezer or fridge. If cooking from the fridge let your dough sit out for 20 minutes to soften. If baking from the freezer thaw your dough in the fridge the night before baking then let your dough sit out on a counter for 20 minutes before baking.
 
Enjoy!
 

Thursday, October 2, 2014

Alambres

Over the weekend I bought a package of bacon from Safeway but then I got too lazy to fry up bacon along with the fluffy buttermilk pancakes I made Tony on Sunday. Tuesday I was contemplating what to do with said bacon that was out of the ordinary (I think about food way too much) and  a lightbulb went off in my brain... Alambres!

Alambres are one of those dishes that my Mom never cooked for us and I have only had once or twice my whole life from a mexican restaurant. The name "Alambres" literally means "wires" and this dish is like a stir fry with steak or chicken sauteed with bacon, onions, tomatoes, jalapeno (or if you are like me mushrooms because I have some in my fridge calling my name) and then topped with cheese and served on tortillas. Sounds heavenly right?
 
Make this today, you will thank me.
 
Serves 4
 
What you will need:
7-10 green onions
2 Bell pepper (any color)
1 Jalapeno
5 Mushrooms, optional
1 Roma tomato
1 Chicken Breast
12 OZ Bacon
1-2 Cloves of Garlic, pressed
1 cup shredded Jack cheese
2 TBSP oil
Salt to taste
Tortillas (flour or corn) for serving


Optional: Sour Cream 
 
1. Start by slicing all your veggies into thin long slices (everything is supposed to resemble "wires"). You may keep the seeds in the jalapenos if you want this spicy, if not remove the seeds. For the green onions, I removed part of the green ends and sliced the green onions lenthwise in half.


I made you this nifty collage... look at me being crafty

 
Mushrooms are everything
 
 
2. Season with salt and slice your chicken into lengthwise 1 inch slices and cut your bacon strips in quarters. Cut your bacon into thinner long slices, keep thinking wires!
 
3. Heat up a large nonstick skillet with 2 TBSP of oil and add your garlic and bacon followed by your chicken. Stir and cook your meat for about 15 minutes until your chicken is no longer pink, your bacon is partially cooked and there's lot's of natural fat and juices sweated out of the meats. Add all your veggies minus the tomatoes, constantly stirring and cook until most of the juices have evaporated and your meat and veggies are soft and slightly browned.


This looks about ready to add the veggies...


Add those veggies...

4. Towards the end of cooking, add your tomatoes. I like to add them at the end so they don't turn into mush and give the Alambres a nice pop of red.


With the tomatoes looking good, I think it's time for cheese...
 
5. Once your Alambres are done top with shredded Jack cheese and allow to melt before serving with warm tortillas and a dollop of sour cream.

 
Close up of the final product!
 
 
Yum.. This came out really yummy especially when you add a dollop of sour cream to your tacos, it sort of balances out the saltiness of the bacon. I made the mistake of not cutting the bacon and the chicken into super long strips to make this look more like wires.
 
This dish can be customized to your liking, you essentially want bacon, meat and veggies sauteed and topped with cheese. Feel like adding more mushrooms, subbing some zucchini or adding some sweet corn? Go for it. The possibilities are endless.

Enjoy!
~Mely


Wednesday, October 1, 2014

Rich Brownies

After making Red Velvet Cake last week, I had leftover cocoa powder and what better way to use cocoa power than to make Brownies from scratch?! So I called in the help of my best friend Google to help me find the perfect Brownie recipe and I found this one.
 
It knocked my socks off. It was really really chocolatey! I brought some to work and they were a hit with my coworkers. The only thing I did different than the original recipe was I microwaved the Butter, Cocoa and Sugar instead of using a double broiler on the stove. I also used Salted Butter and reduced the amount of Salt I added. Try these when you're up for some rich chocolatey deliciousness.
 
Brownies!
Yields 20 small or 12 large brownies
 
1 1/4 sticks salted butter
1 1/4 cups sugar
3/4 cup plus 2 tablespoons unsweetened cocoa powder (natural or Dutch-process)
1/8 teaspoon salt
1/2 teaspoon pure vanilla extract
2 cold large eggs
1/2 cup all-purpose flour
optional: 2/3 cups of chopped Walnuts
 
Preheat your oven to 325 degrees.
 
Place the butter, sugar, and cocoa powder in a microwave safe bowl and place in the microwave for 2 minutes. Take out and mix with a whisk then place in the microwave another minute or two to finish melting the butter. Take out of the microwave and whisk together making sure the butter is melted and all the ingredients are mixed into a beautiful fudgey looking concoction. Let the batter cool for a couple minutes.
 
Using a wooden spoon mix in the Vanilla. Then add the eggs, one at a time mixing really well. When the batter is mixed and shiny add the Flour and vigourously beat with the spoon until you can no longer so any white spots from the flour.
 
Grease an 8x8 baking pan and add the batter. Bake at 325 for 20-25 minutes until toothpick inserted comes out a tad moist. Remove from oven and allow to cool before cutting.

 
Yum!
~Mely
 

Thursday, September 25, 2014

Omega Chicken Salad

Last week I ventured out to the supermarket to buy the ingredients for some sweet Chicken Salad with Craisins, Apple and Almonds. As I pensively stood in the aisle, I realized I could buy a seperate bag of almonds and craisins but I saw this "Omega Blend" and I was intrigued.
 
 
This Omega Blend has a combination of things that are lovely in a Chicken Salad! These include Walnuts, Almonds, Pistachios, Craisins and Pepitas (Pumpkin Seeds).
 
I bought the Omega Blend and set out to make a new Chicken salad recipe! The results were just as good as I thought they would be. Try this out sometime, it's easy and has a nice crunch!
 
Omega Chicken Salad
Makes 4 Sandwiches
 
2 Cups Shredded Chicken Meat
1/3 C. Omega CranMix (if you can't find this any mix of Craisins and Nuts works well)
3-4 TBSP (more or less to taste) Mayo or Greek Yogurt
1 TBSP Diced Onion
1 Apple Diced (Granny Smith or Gala work well)
Salt and Pepper to Taste
Mini French Rolls or Sliced Bread for Sandwiches
 
 
Simply combine and mix all your ingredients in a large storable container and refrigerate at least 3 hours before serving!


I served mine on one of my favorite ever mini french rolls and it was delicious. A perfect weekday lunch!


Enjoy!
~Mely